 By Baxter Overman | August 24, 2025 in
Cleaning wheels and tires sounds easy enough…and it isn’t difficult. But you need to know how to properly wash wheels and tires to get the results you want. That’s because not all wheel cleaning jobs need the same products.
This wheel and tire wash process works well for even the dirtiest wheels and tires, and at minimum you’ll need a cleaner, a wheel cleaning brush with a long handle, AND a soft-bristled brush for cleaning lug nuts.
But for routine washing, it’s helpful to pick up a few additional products. Here’s what we recommend for wheels and tires:
Equipment we recommend
- A dedicated wheel bucket
- Wheel degreaser, iron remover, or all-purpose cleaner (more on that later)
- Car shampoo (for use on paint and wheels)
- Tire dressing and/or wheel polish (optional)
- Foam gun or foam cannon
- One or more detailing brushes
- A wheel brush like the Wheel Woolie for inside the wheel rim
- A tire brush for tire sidewalls
- Old but clean microfiber towels
New to Detailing? View Our Favorite Products
If you’re building your car detailing arsenal on a budget, here are a few products to pick up online (and the reasons we like them).

Step 1: Remove loose debris from your vehicle
Before washing wheels, remove any twigs, leaves, or loose debris first (wet debris can be harder to remove later).
Check out my post on what order to wash your vehicle if you’re unsure. Long story short…washing wheels first prevents brake dust and grime from splattering onto clean panels.
Step 2: Spray down wheel wells
I typically use a power washer to spray down wheel wells before I clean wheels to remove any road tar, salt, or sand. At a minimum, a quick spray with the hose works.
Once rinsed, it’s time to select the products you need. Before you begin, go ahead and add your favorite car soap to your tire bucket (more on that in a minute).
Remove any heavy dirt or mud with soap and a power washer before applying tire cleaners. You want cleaners to attack brake dust and grime…not easy-to-remove dirt.
Step 3: Apply a wheel and tire cleaner
Depending on your situation, you’ll need the right wheel cleaner, so here’s how to choose.
Want convenience? Use a pH-balanced tire cleaner
If brake dust isn’t heavy, we recommend a foaming pH-neutral wheel and tire cleaner safe for all wheel finishes. Since I wash often, I prefer to dilute a safe all-purpose cleaner (like Super Clean) into my foamer…but occasionally I’ll use a standard wheel and tire cleaning product. The selling point of dedicated tire cleaners is convenience and safety (since they’re already formulated and diluted for this application).
Use a standard soft-bristled detailing brush to work around lug nuts and hard-to-reach areas, followed by a microfiber tire cleaning brush (They look like a giant carrot on a stick). These are designed to clean flat surfaces inside the wheel rim and around brake calipers.
Wash often? Use all-purpose cleaners or diluted degreasers to save money
Let me caviot this tip by saying not all ‘degreasers’ are designed for washing cars, nor should they be used on cars. Strong acids and other cleaners can also be harsh on certain coated wheel finishes. However, many all-purpose cleaners or degreasers can be used to safely wash wheels and tires if diluted.
Many all purpose cleaners and degreasers can be diluted into a spray bottle or foamer (check the dilution chart on the product). If you have large wheels and tires (or have many vehicles), diluting your products can save a ton of money and is the more practical approach in my opinion.
Use an iron remover for heavy brake dust
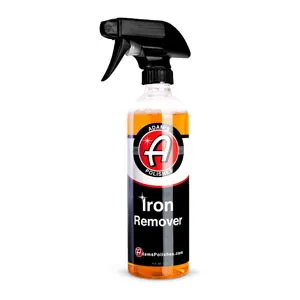
In the case of brake dust or industrial fallout (iron deposits), use a spray-on iron remover for wheels. These products usually turn a purple color when they make contact with metal and specifically target iron deposits that normal tire cleaners struggle to remove.
Adam’s Iron Remover
Why I like: This product is pH neutral, made in the USA, and affordable.
If you click this link and make a purchase, we earn a commission at no cost to you. Thanks for your support.
Avoid strong acids to clean wheels. These are harsh, can damage paint, and are best left for cleaning other surfaces…not vehicles! If the solution easily cleans wheels without any scrubbing…it’s too strong and can damage rubbers and the wheel finish.
Be sure to scrub the tires
If you have very dirty tires, now is the time to use your long-handled tire brush. I like to wait a few seconds to let the all-purpose cleaner or foaming wheel cleaner cut through the grime before scrubbing.
If your tires are brown, it’s likely due to trapped dirt or a browning process caused by anti-ozonants. You can learn more about that in my post and video on why tires turn brown and how to fix it.
Step 4: Apply a car soap for any missed spots
In a tire bucket, we recommend soaping down the wheels and tires at the end, just to clean up any leftover wheel cleaner or dirt missed. A car shampoo with some level of wax can be helpful to coat your wheels with a thin layer of protection.
This step is optional, but good practice before adding any tire dressings or wheel sealant products. If the tire is very dirty to start, we recommend starting with soap.
Make sure both tires and wheels are completely dry before applying a tire dressing so the dressing bonds properly. To avoid water spots on the wheel, I also like to use an old (but clean) microfiber towel during the drying phase.
Step 5: Apply a tire dressing
To finish up, apply a tire dressing to achieve the natural or glossy look you prefer. A good dressing can also help condition your tires and prevent them from cracking and drying out prematurely.
Petroleum-based vs water-based tire dressings
Petroleum-based tire dressings will give you a higher shine than water-based dressings; they also hold up a bit longer. The downside is that these products tend to sling quite a bit.
Many of these petroleum or solvent-based products some in gel form or in an aerosol can.
Water-based tire dressings don’t last as long, but still protect the wheel for a couple of weeks after application. Water-based dressings provide a more natural look to the wheel and often come in gel or spray form.
Step 6: Protect your wheels after washing
Once clean, apply a layer of protection to your wheels for even shinier results.
For wheels, I recommend this ceramic wheel sealant made by McKee’s.
McKee’s 37 Ceramic Wheel Sealant
What I like
Polishes and protects at high temperatures
If you click this link and make a purchase, we earn a commission at no cost to you. Thanks for your support.

This product helps repel brake dust and goes on just like car wax. Simply apply with the applicator pad, and buff out the haze.
You don’t have to apply a wheel sealant every single time you wash, but it can help repel substances like brake dust in between washes.
And that’s it! This is one of the topics we cover in our detailing course for beginners, and essential to washing your car like a pro. Hope it helps!

Learn the basics of car care and gain confidence in your ability.
This video course unpacks the fundamentals of washing and detailing. From exterior cleaning and blemish removal…you’ll learn the secrets that will give you spotless pro-level results!